
The nice folks at Accuquilt sent me a Go! Baby fabric cutter to try out, and promised a second Go! Baby to give away to one of my lovely readers. I started this blog just shy of a year ago, and this generous offering from Accuquilt marks both my first blog swag and my first giveaway.

The die comes in a plastic tray, surrounded by foam. It cuts two quarter circles and two notched squares. The finished units measure 3.5".

Here's what the die looked like after a few cuts. The die blades lie in the faint lines in the foam.

A few months back Robert Kaufman sponsored a solids challenge and gave everyone in my quilt guild a charm pack of 43 five-inch squares in various colors to work with. I'm a little late on this, but it turns out the charm squares fit nicely over a single drunkard's path unit.

I stacked six at a time.

Then laid the cutting mat over the fabric and tray.
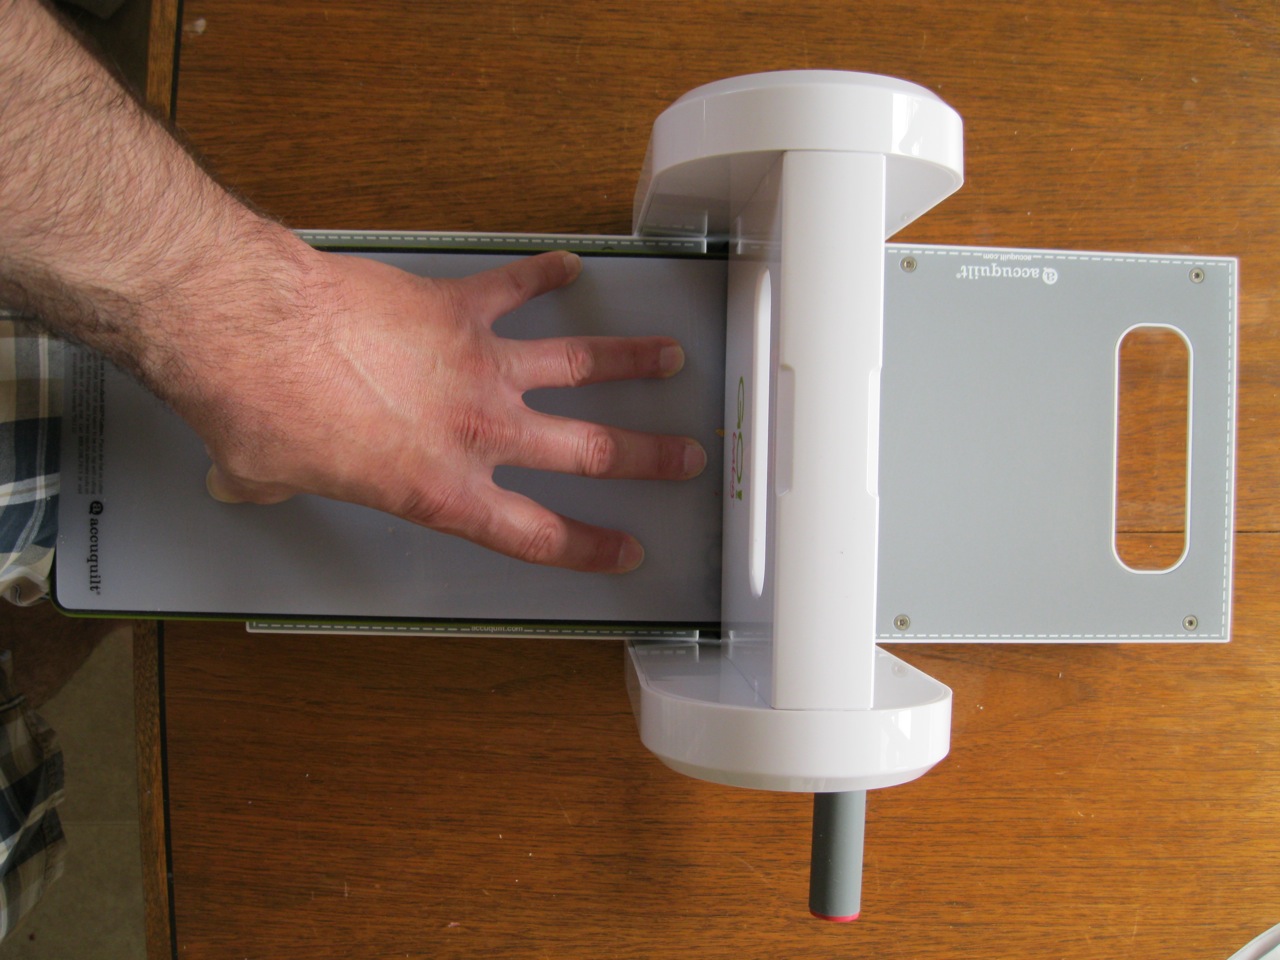
And aligned the tray with the Go! Baby roller.

The contraption has a steel roller that pressed down on the cutting mat, compressing the foam and pressing the fabric against the cutting die in the tray.

I cut through the whole charm pack quickly and precisely. This would have taken me days with a template and rotary cutter.

Next I cut an equal number of off-white units.

I folded strips in three layers and ran them through the cutter. I wasn't particularly careful about waste, but even so it seemed very efficient to me. Next comes the fun part: sewing 86 little curves. The die-cut notch in the center of each curve is very helpful.

Each unit get three pins: one in the center, one about 3/8" in from the leading edge, and the last about 1/8" in from the end of the seam.

For curve sewing novices, it is helpful to approach the curve as three separate seams. The first seam is just a quarter of an inch between the edge and the first pin. Align the edges and sew almost to the first pin.

Remove the pin and align the edges to the middle pin. I find it helpful to lift the fabric in a gentle curve. Roll the two edges along your finger, being careful not to pull or stretch the fabric.

Sew to the middle pin, then remove it. You have finished your second seam.

Align the edges for the remainder and sew your third seam. Ta da!

14 down, 72 to go. I have a few ideas for how I might arrange these -- some symmetrical tiling options, some more irregular. I can't wait to try them out.
Thanks for the detailed demo - very cool. Hopefully the Go! helps you finish up that hexagon quilt :)
ReplyDeleteThose notches are nifty - what a great help! Looking forward to seeing what you come up with.
ReplyDeleteThey look great! I think you're right that the drunkard's path shapes are the most useful ones for the GO cutter. I look forward to seeing what you make.
ReplyDeleteThe notches on these curved pieces makes me reconsider the GO cutter.
ReplyDeleteOMG, I'm so jealous, I've been looking at those!
ReplyDeleteAwesome - This tool would perhaps lead to perfect -- cough - better seams from me! Birgit
ReplyDeleteYou lucky duck! Looks great so far. Curves still scare me but I can see how having a GO cutter would help things along! www.paperstarfish.prettyposies.com
ReplyDeleteI have to say - the Drunkard's Path pieces is the one item that tempts me most about Go Baby. :D
ReplyDeletelook forward to seeing a great quilt!
ReplyDeleteWow, that's great. My least favourite part of quilting is cutting fabric - I don't know why, I just know my rotary cutter and I don't get along very well. This would help that immensely, particularly as you say, the smaller more intricate shapes.
ReplyDeleteFantastic, and I look forward to seeing how your drunkard's path turns out. And keeping an eye out for your red/blue hexagon quilt too.....that looked spectacular.
Having one of those Go cutters would definitely move some things (anything with curves) higher on up my to-make list.
ReplyDeletewow, that saves an insane amount of time!
ReplyDeleteLucky you! I like that you are breaking down the process, step-by-step. I have been thinking about getting one of these Go! Baby cutters. I like the idea of the drunkard's path one and the apple core one. Looking forward to see what you do with your DP blocks!
ReplyDeleteThanks for all the process photos - they're much appreciated! I love a good drunk(ard's path). :)
ReplyDeleteI never had much interest in those cutters cuz...really how hard is it to cut simple shapes. Didn't consider it use for the "odd" shapes that we have to do with templates...totally would save time!
ReplyDeleteBrilliant! For all the buzz around these cutters this is the first time I've seen a clear presentation of how they actually work.
ReplyDeleteAnd I'm so impressed with the idea of the notch at mid-point of this particular die!
What an amazing gadget - I've never heard of that. Good demo, too.
ReplyDeleteI'm with you - I'd pick Drunkard's Path and Applecore for certain,and probably tumblers just to have the corners clipped for me. Those notches make all the difference! Thanks for sharing the process.
ReplyDeleteI can't wait to see how you use these traditional shapes to make a quilt. I know it's gonna be something special!
ReplyDelete